
How do I pay with Flash Pay?
What this guide covers
This guide shows you how to pay a merchant that supports Flash Pay and how to check the transaction status and on-chain record afterward.
Quick path: Open Scan → scan the merchant code → verify the merchant and amount → bind your email if this is your first payment → select an asset and network → confirm payment → check the result.
Requirements and before you start
- DeBox is installed and you are signed in; Flash Pay is available in your current App version.
- DeBox has permission to use your phone's camera.
- Your wallet holds an asset listed on the payment page. Current source material mainly covers USDT and USDC; follow the list shown at checkout.
- Your balance covers the payment and any fees shown on the page. If a network fee is required, follow the prompt to prepare the network's native token.
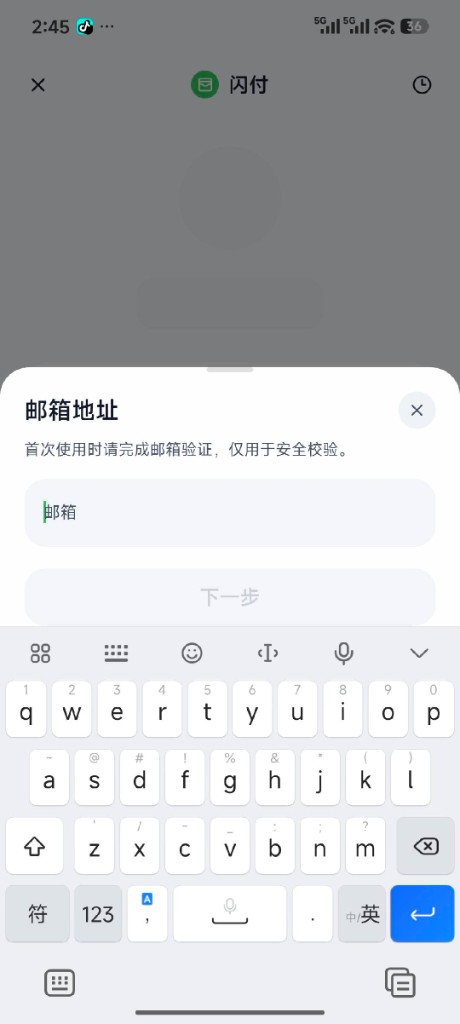
- The first use of Flash Pay requires you to bind and verify an email address for payment receipts and notifications.
Verify the merchant, amount, asset, and network. An on-chain transaction usually cannot be reversed after submission. Do not scan or pay again for the same purchase while the order is processing.
Steps
1. Open Scan
Use either entry point:
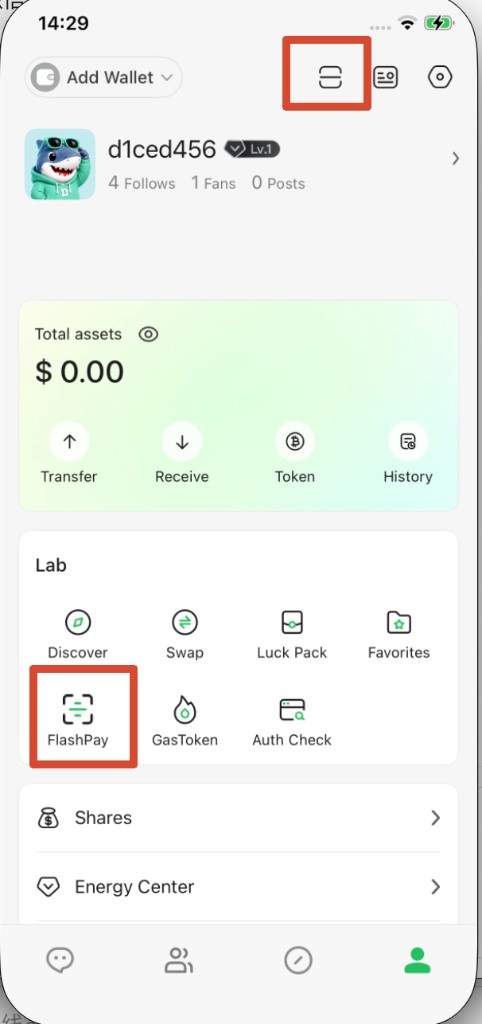
- Open bottom Profile / Me, then tap Scan in the top-right; or
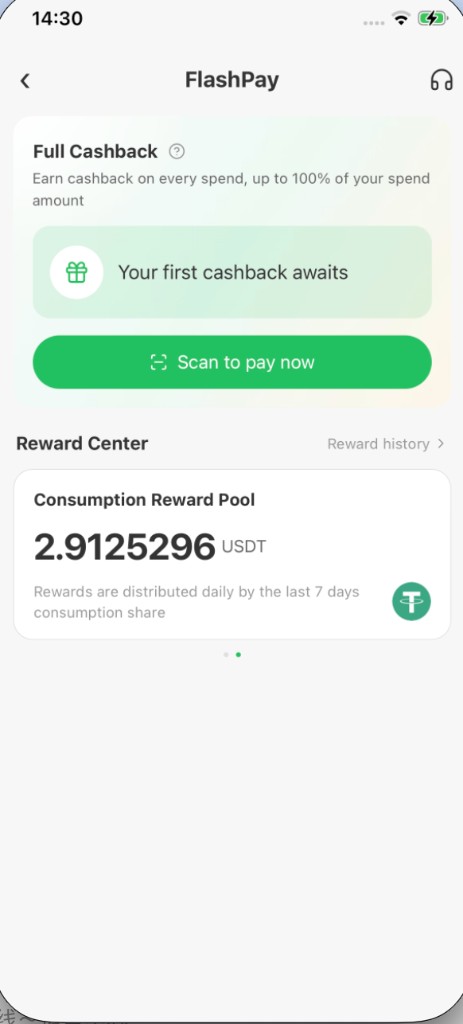
- Under Lab, open FlashPay / Flash Pay, then tap Scan to pay now.
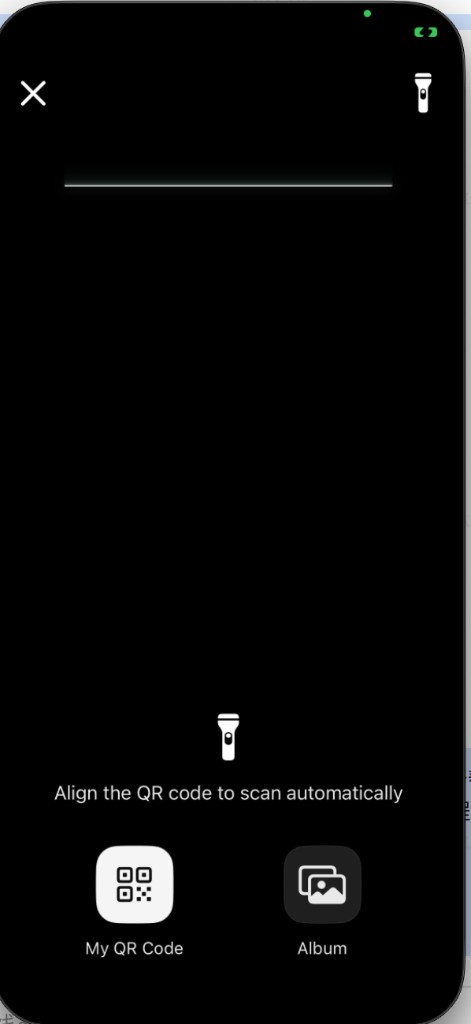
When the camera opens, you can scan the merchant payment code (bank/merchant QR codes may be supported—follow the live App).
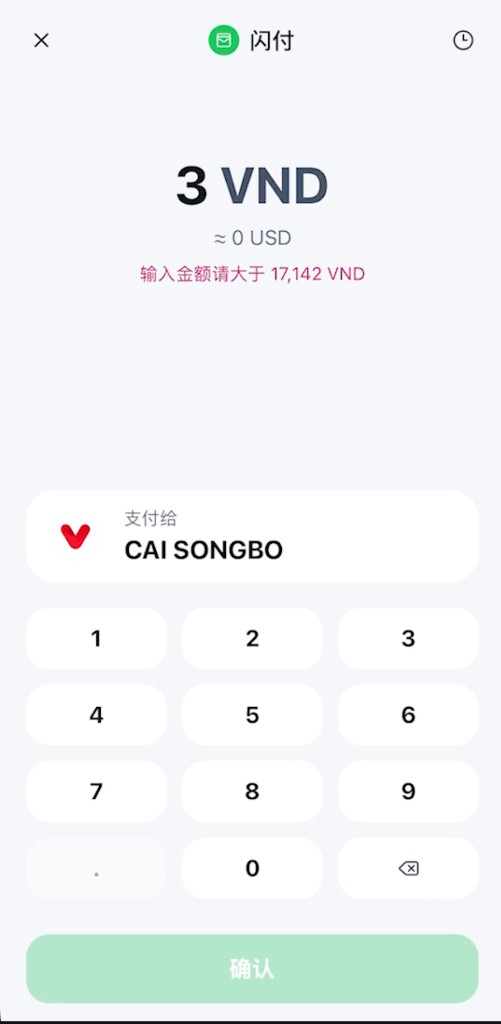
2. Scan the code and verify the payment
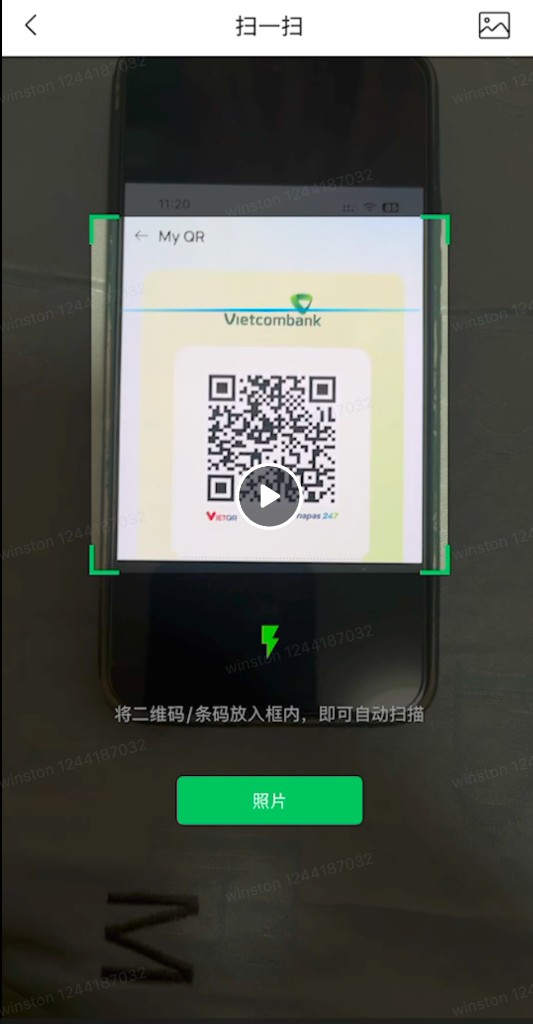
- Keep the entire merchant QR code clear in the camera frame; you can also pick a QR image from Album.
- After recognition, verify the merchant name and payment currency.
- If the code includes an amount, it appears automatically. Otherwise, enter the amount provided by the merchant.
- Follow any minimum amount or other limit shown on the page (for example, “enter more than …” prompts).
If the merchant or amount is incorrect, go back and ask the merchant for a new code. Do not continue.
3. Bind your email on first use
If the page asks you to bind an email:
- Enter an email address you regularly use.
- Complete verification as instructed.
- Return to the payment flow after verification succeeds.
Email binding is generally completed once. If the App asks you to verify again, follow the current security prompt.
4. Select the payment asset and network
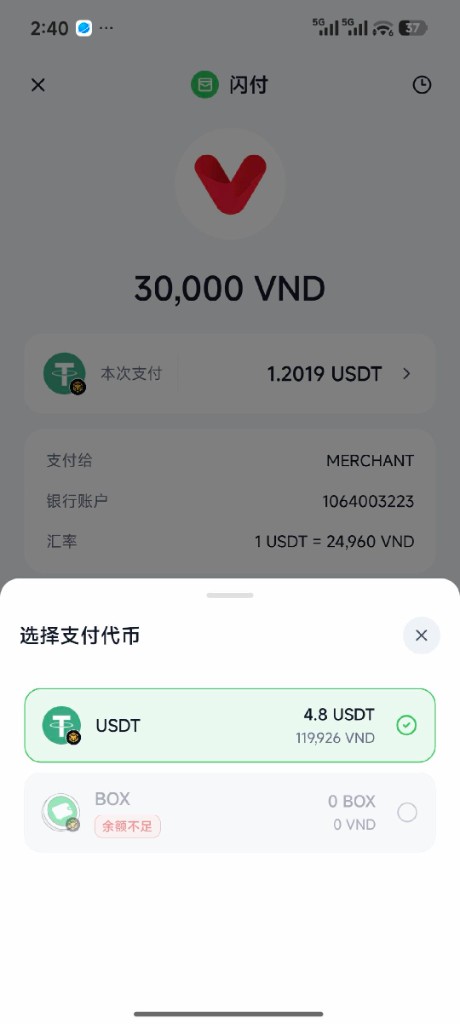
- Select an asset shown on the page, such as USDT or USDC (BOX or others may appear—follow the list).
- Verify the asset's network; do not rely on the token symbol alone.
- Review the displayed exchange rate, estimated amount to be deducted, and fee details.
- Continue only after confirming that the wallet balance is sufficient; assets with insufficient balance are usually disabled.
Rates and estimates may change with market or payment-channel conditions. Follow the final confirmation screen.
5. Confirm and pay
- Recheck the merchant, amount, asset, network, exchange rate, and fees.
- Tap Confirm.
- The first use of an asset may require an asset approval. Approval alone is not a completed payment; continue through the payment confirmation prompts.
- Complete fingerprint, face, or PIN verification as shown.
The system submits the payment request after verification succeeds.
6. Check the payment result
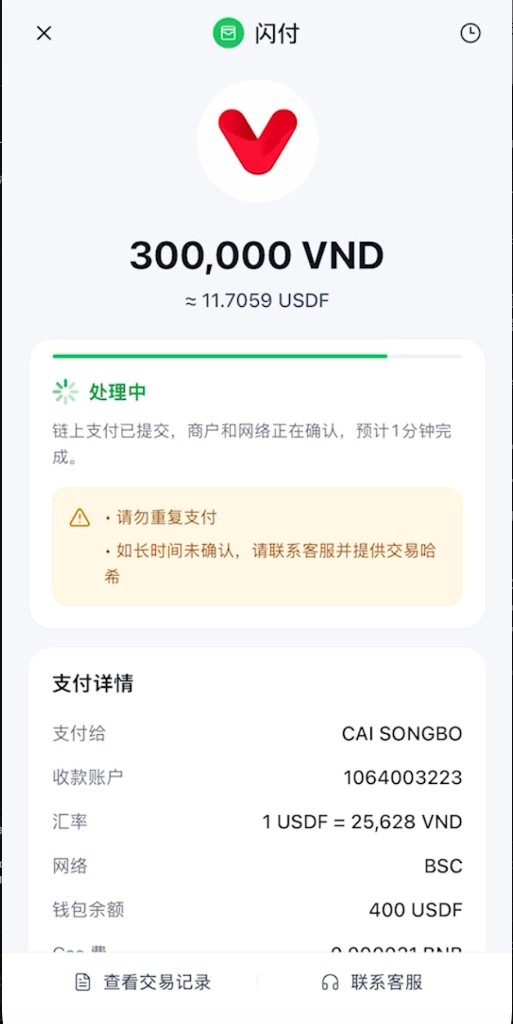
After submission, the page shows one of these states:
| Status | What it means | What to do |
|---|---|---|
| Processing | The payment was submitted and is waiting for network or merchant confirmation | Stay on the page or check history later; do not pay again |
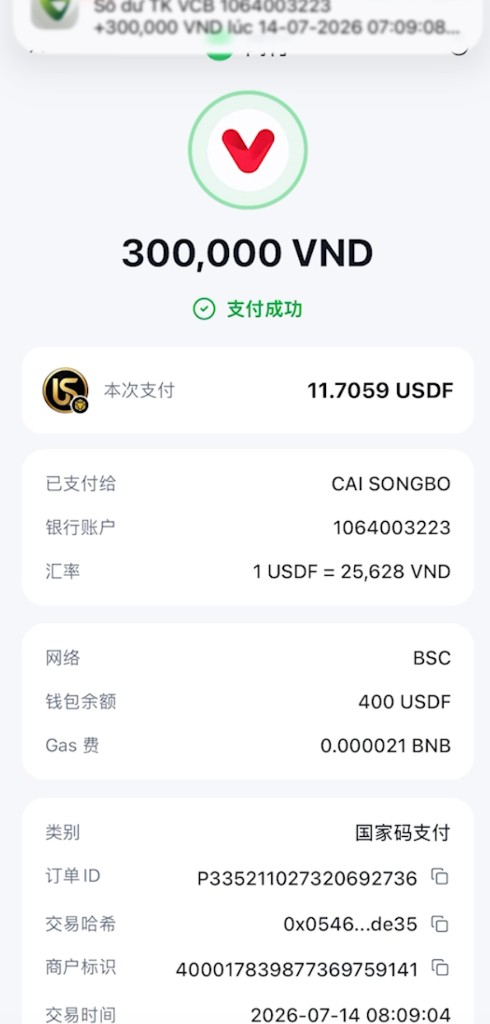
| Successful | The result and payment details are displayed | Show the result to the merchant and keep the record |
| Failed | A failure reason is displayed | Fix the stated issue before choosing Retry |
Processing screens often warn Do not pay repeatedly. If confirmation takes too long, contact support with the transaction hash (follow the page).
7. Check transaction history
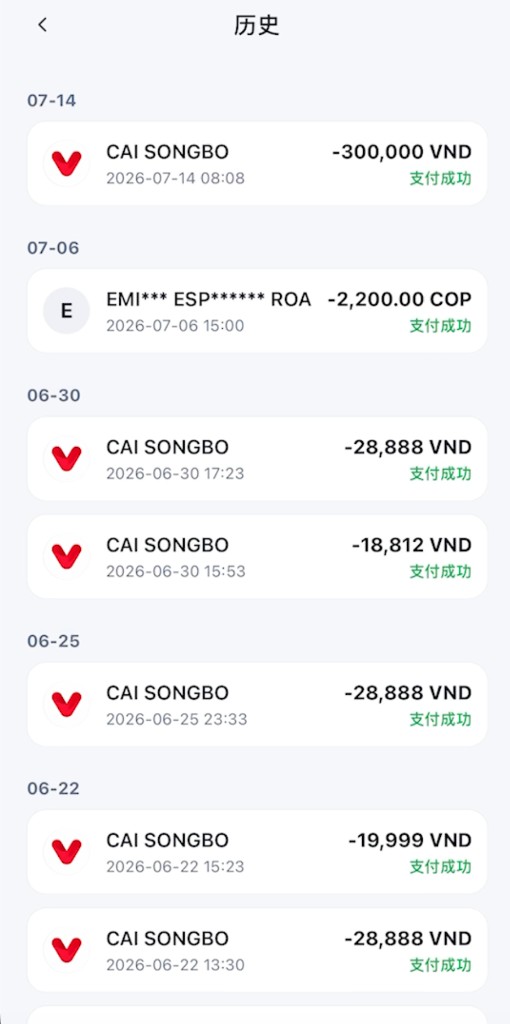
- Return to Flash Pay home and open History / transaction history (often via the clock icon).
- Transactions are listed from newest to oldest.
- Open a transaction to see the merchant, amount and asset, time, status, and any blockchain record provided by the page.
Countries and payment channels
Flash Pay is mainly used to scan local merchant QR codes. The following countries/regions and common channels are listed from current source material.
Note: Availability depends on partner rollout, the merchant QR type, and your App version. Treat the table as a reference and follow what the App shows after scanning.
| Country / region | Payment channel |
|---|---|
| Vietnam | VietQR, Momo QR |
| Philippines | QRPH / InstaPay QR |
| Brazil | PIX |
| Argentina | Transferencias 3.0 QR |
| Peru | Yape / PLIN |
| India | UPI QR |
| Bolivia | OpenBCB |
| Colombia | Bre-B |
| Malaysia | DUITNOW_QR |
| Indonesia | QRIS_QR |
| Singapore | SG_PAYNOW_QR |
| Laos | LA_QR |
| Cambodia | BAKONG_QR |
| Mongolia | MN_QR |
| South Korea | SEOUL_QR |
Common questions
Nothing happens after I scan. What should I do?
Check that DeBox has camera permission, the code is complete and clear, and it is a merchant payment code rather than another QR type. If it still cannot be read, ask the merchant to refresh the code, or try importing from Album.
Why does the App ask me to bind an email?
Flash Pay requires email binding and verification on first use. If you already completed it but the prompt keeps returning, save a screenshot and contact official support.
Why can the estimated and final deductions differ slightly?
The asset amount may be an estimate affected by exchange-rate movement and related fees. Review the final confirmation screen before paying.
What should I do after a payment fails?
Do not immediately pay again. Read the failure reason, add the payment asset if the balance is insufficient, or add the network's native token if the page reports an insufficient network fee. Retry only after resolving the issue.
The page says Successful, but the merchant says it was not received. What should I do?
Check the transaction status. If it is Successful, show the payment details to the merchant for verification. If it is Processing, wait for confirmation and do not pay again. If the status does not update for an extended period, keep the order details and screenshots and contact official support.
Which payment assets are supported?
Current source material mainly covers USDT and USDC. Availability can vary by merchant, region, or product version, so follow the list shown on the payment page.
Which countries or regions are supported, and which channels?
See the Countries and payment channels table above. Coverage currently includes Vietnam, Philippines, Brazil, Argentina, Peru, India, Bolivia, Colombia, Malaysia, Indonesia, Singapore, Laos, Cambodia, Mongolia, and South Korea. Actual channels follow partner availability and the scan result.