
How do I start a voice room and use screen sharing?
What this guide covers
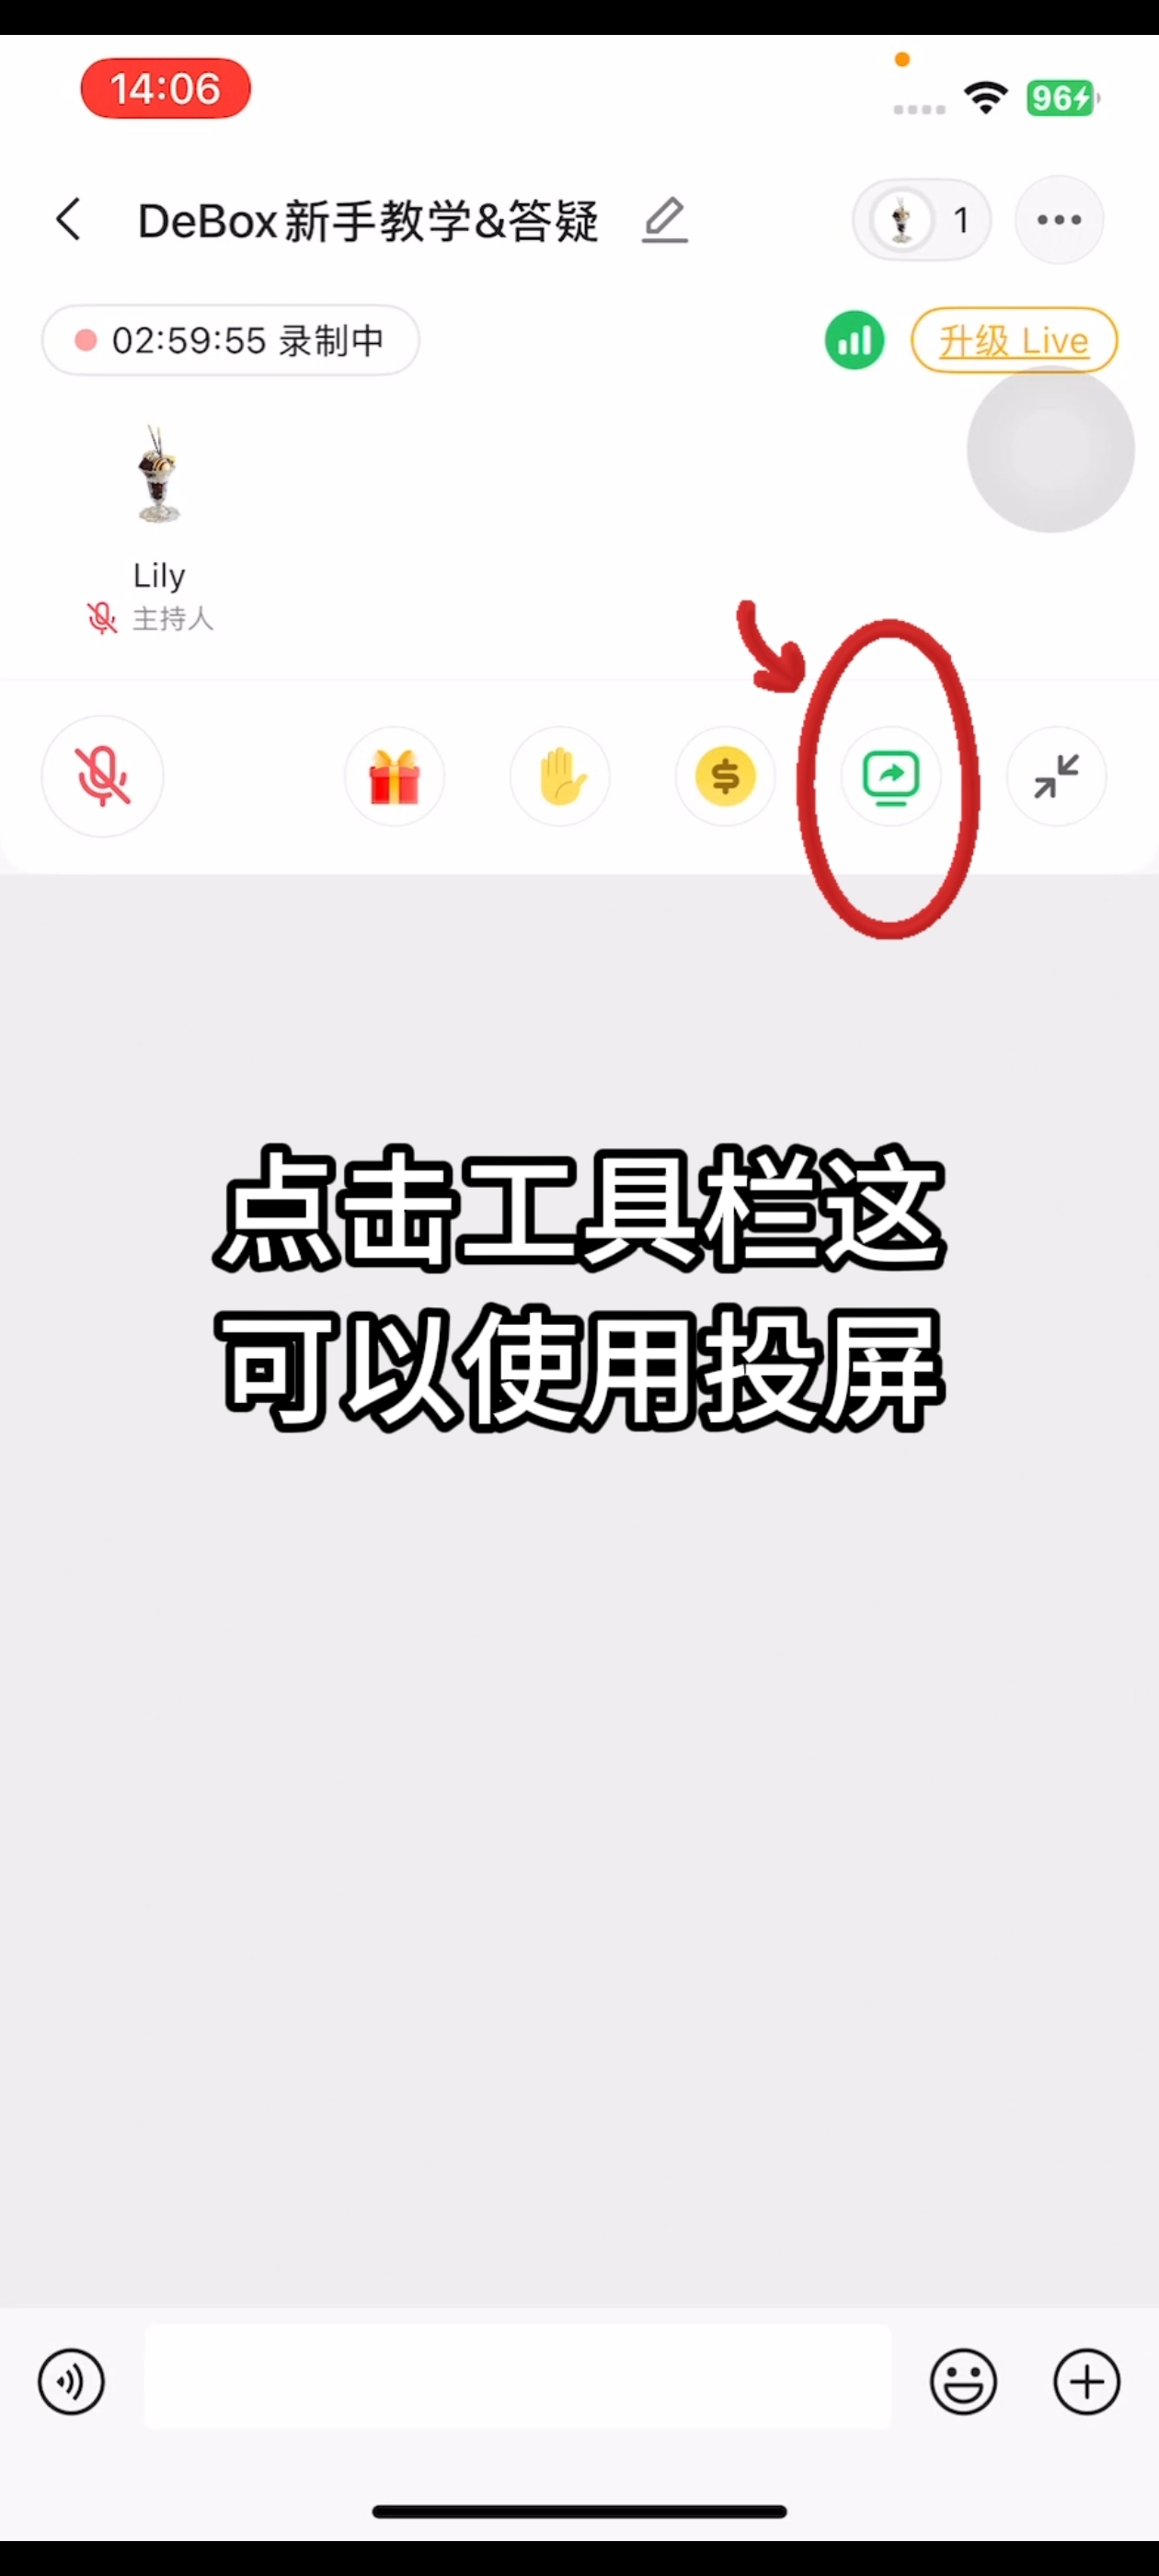
Walks you through how to start a voice room and use screen sharing with screenshots (and video). On-screen labels follow the current App.
Requirements and before you start
- DeBox is installed and you can sign in.
- Some actions require group owner or admin permissions, or follow on-screen prompts.
Video walkthrough
Steps
Follow the screenshots in order (red boxes/arrows match the source tutorial):
1. Step 1
Complete step 1 using the screenshot below.
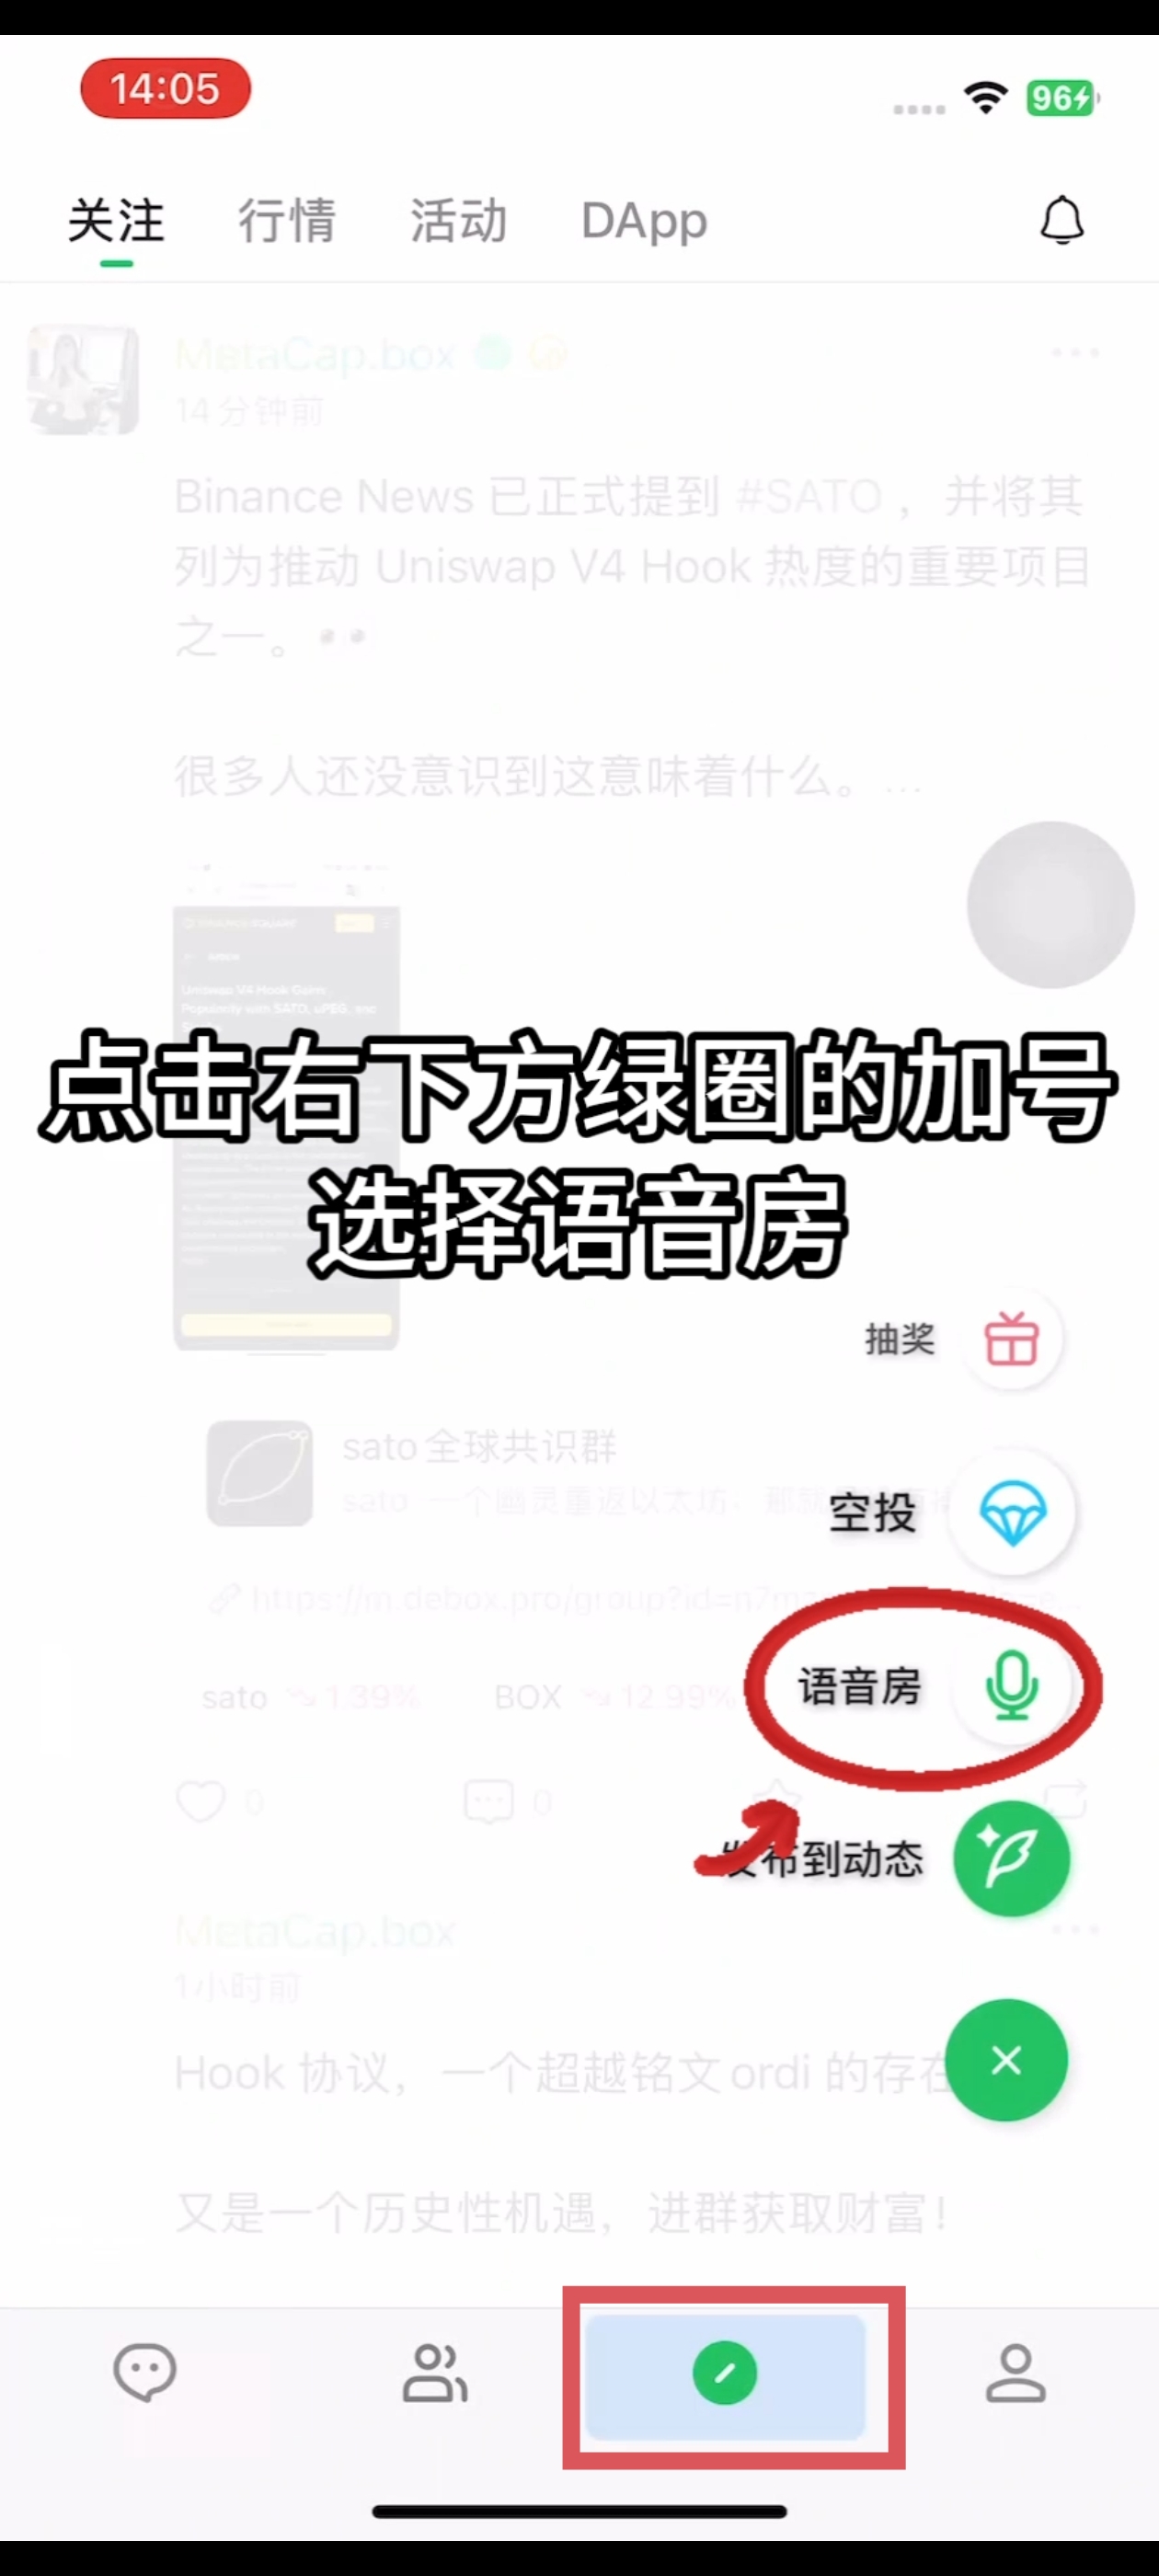
2. Step 2
Complete step 2 using the screenshot below.
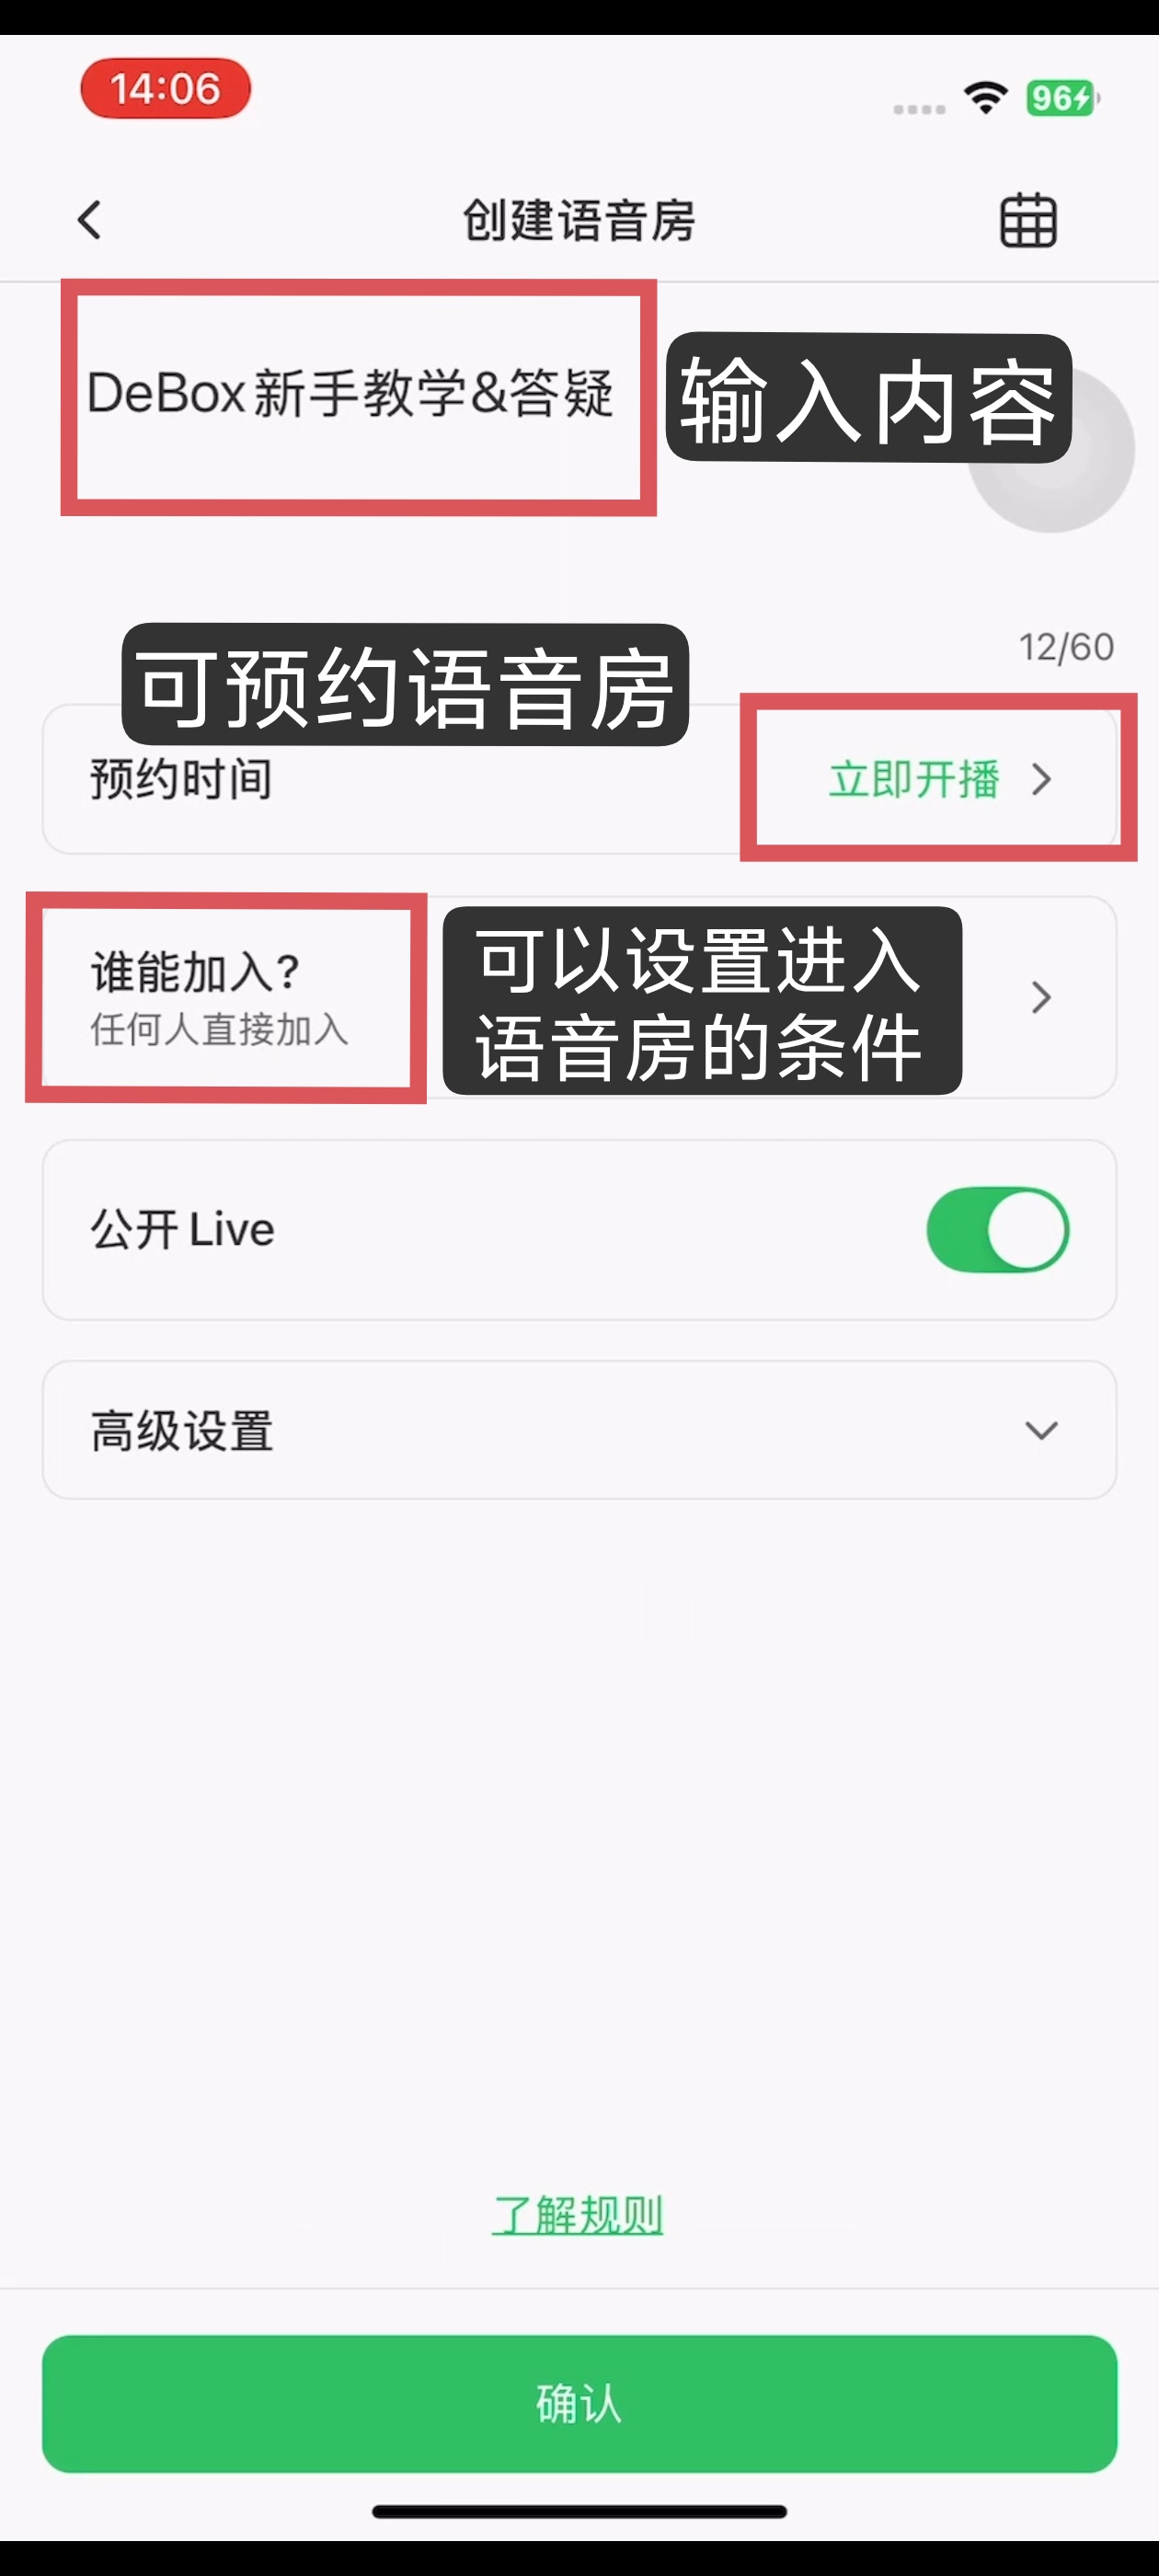
3. Step 3
Complete step 3 using the screenshot below.
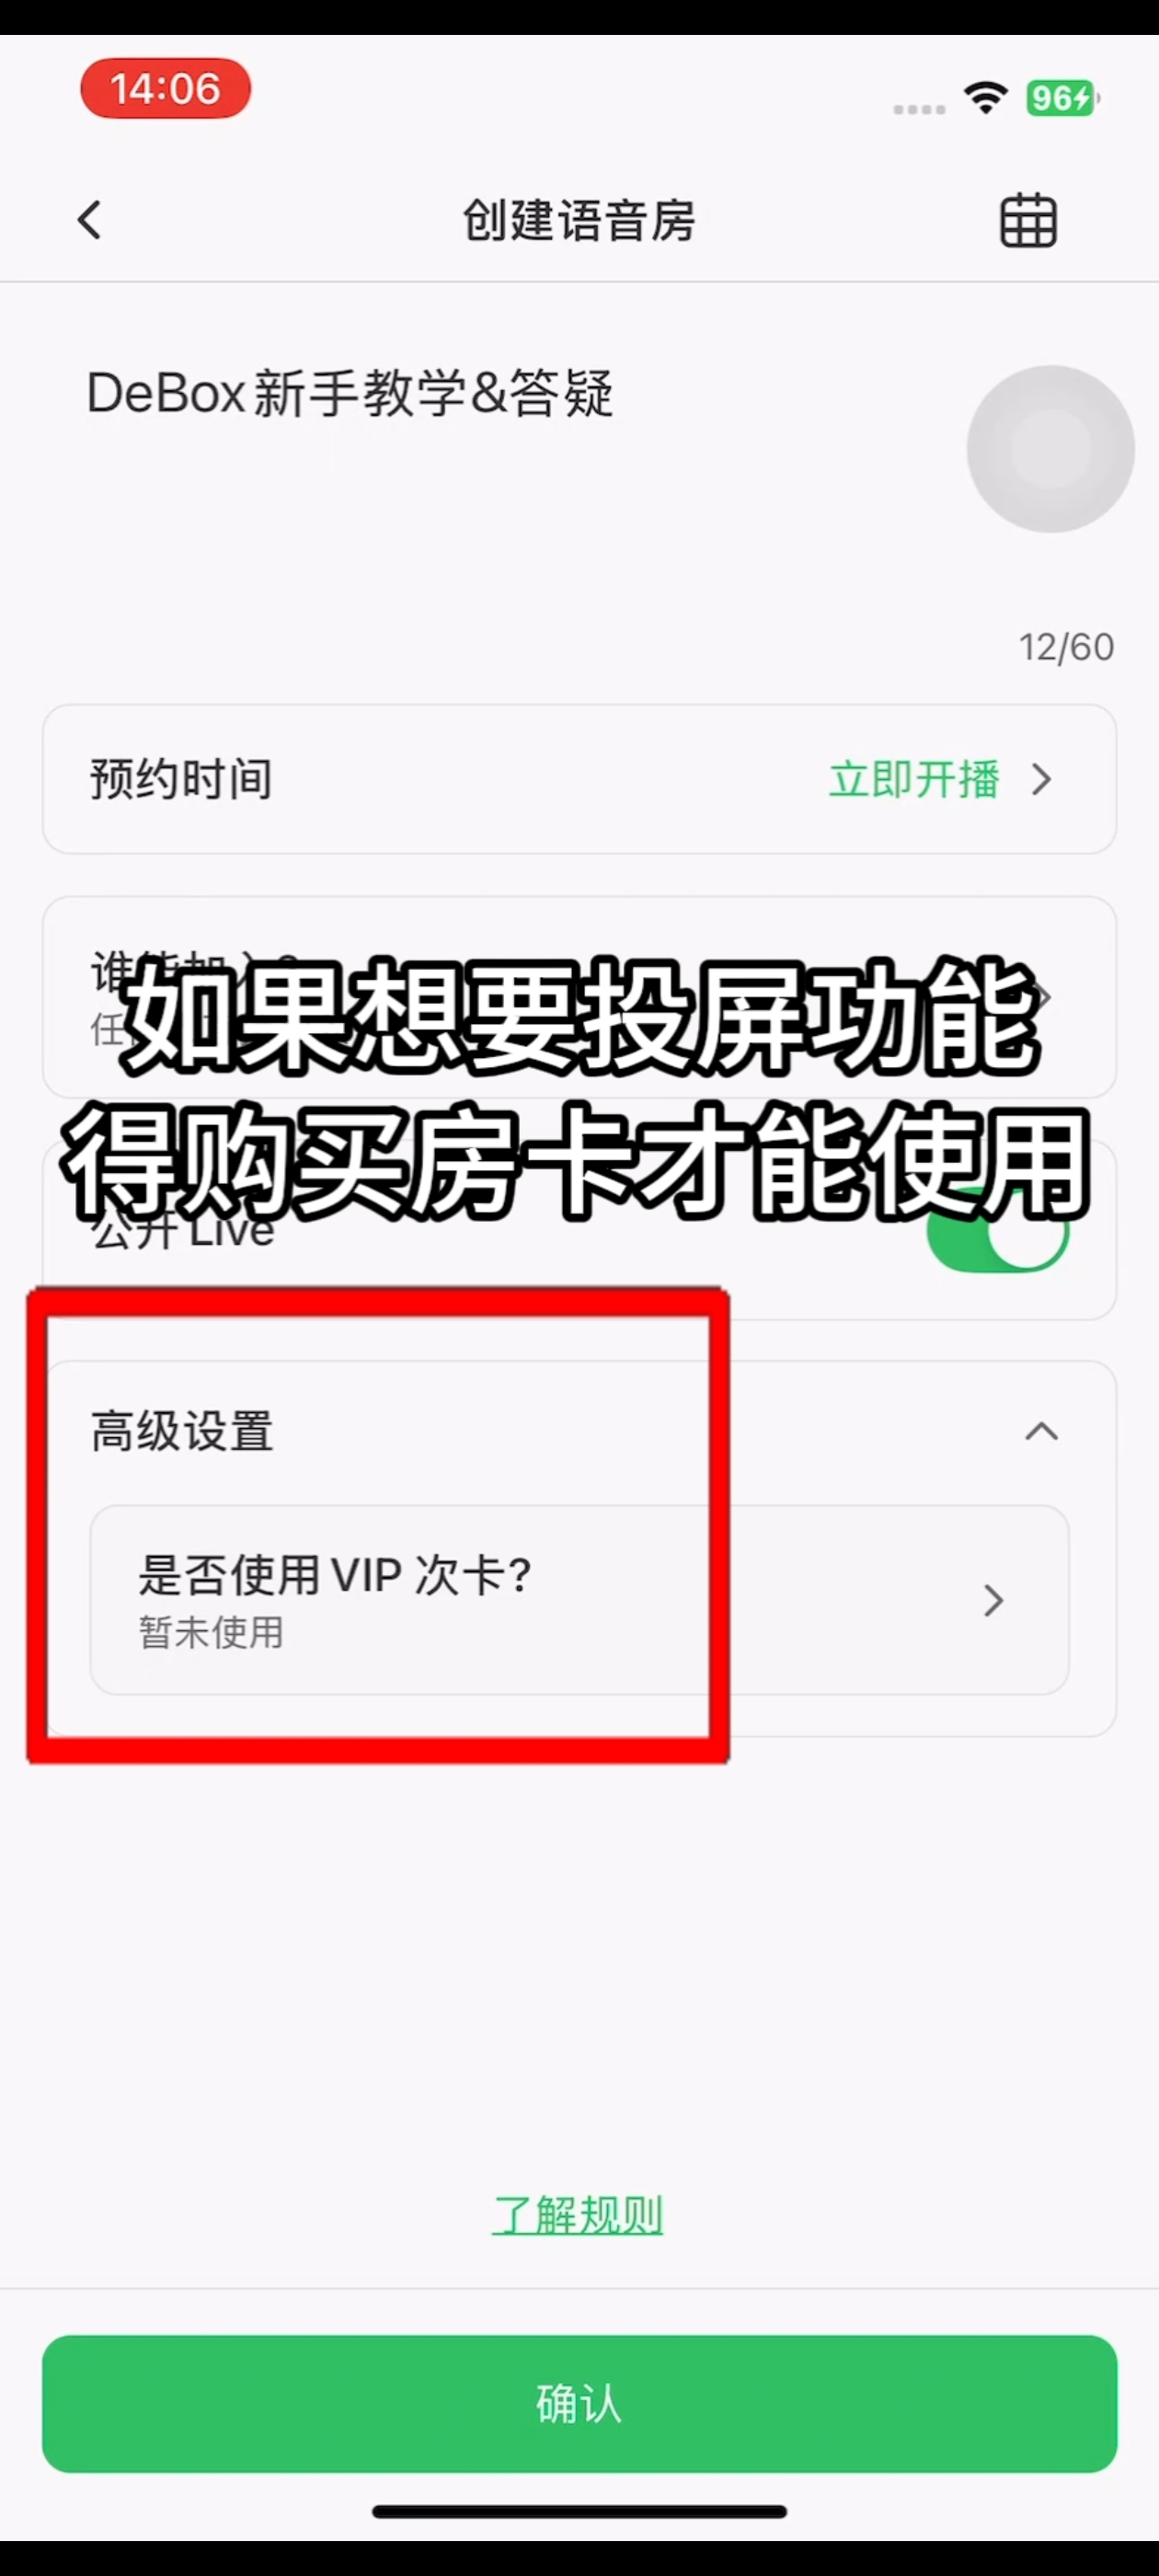
4. Step 4
Complete step 4 using the screenshot below.
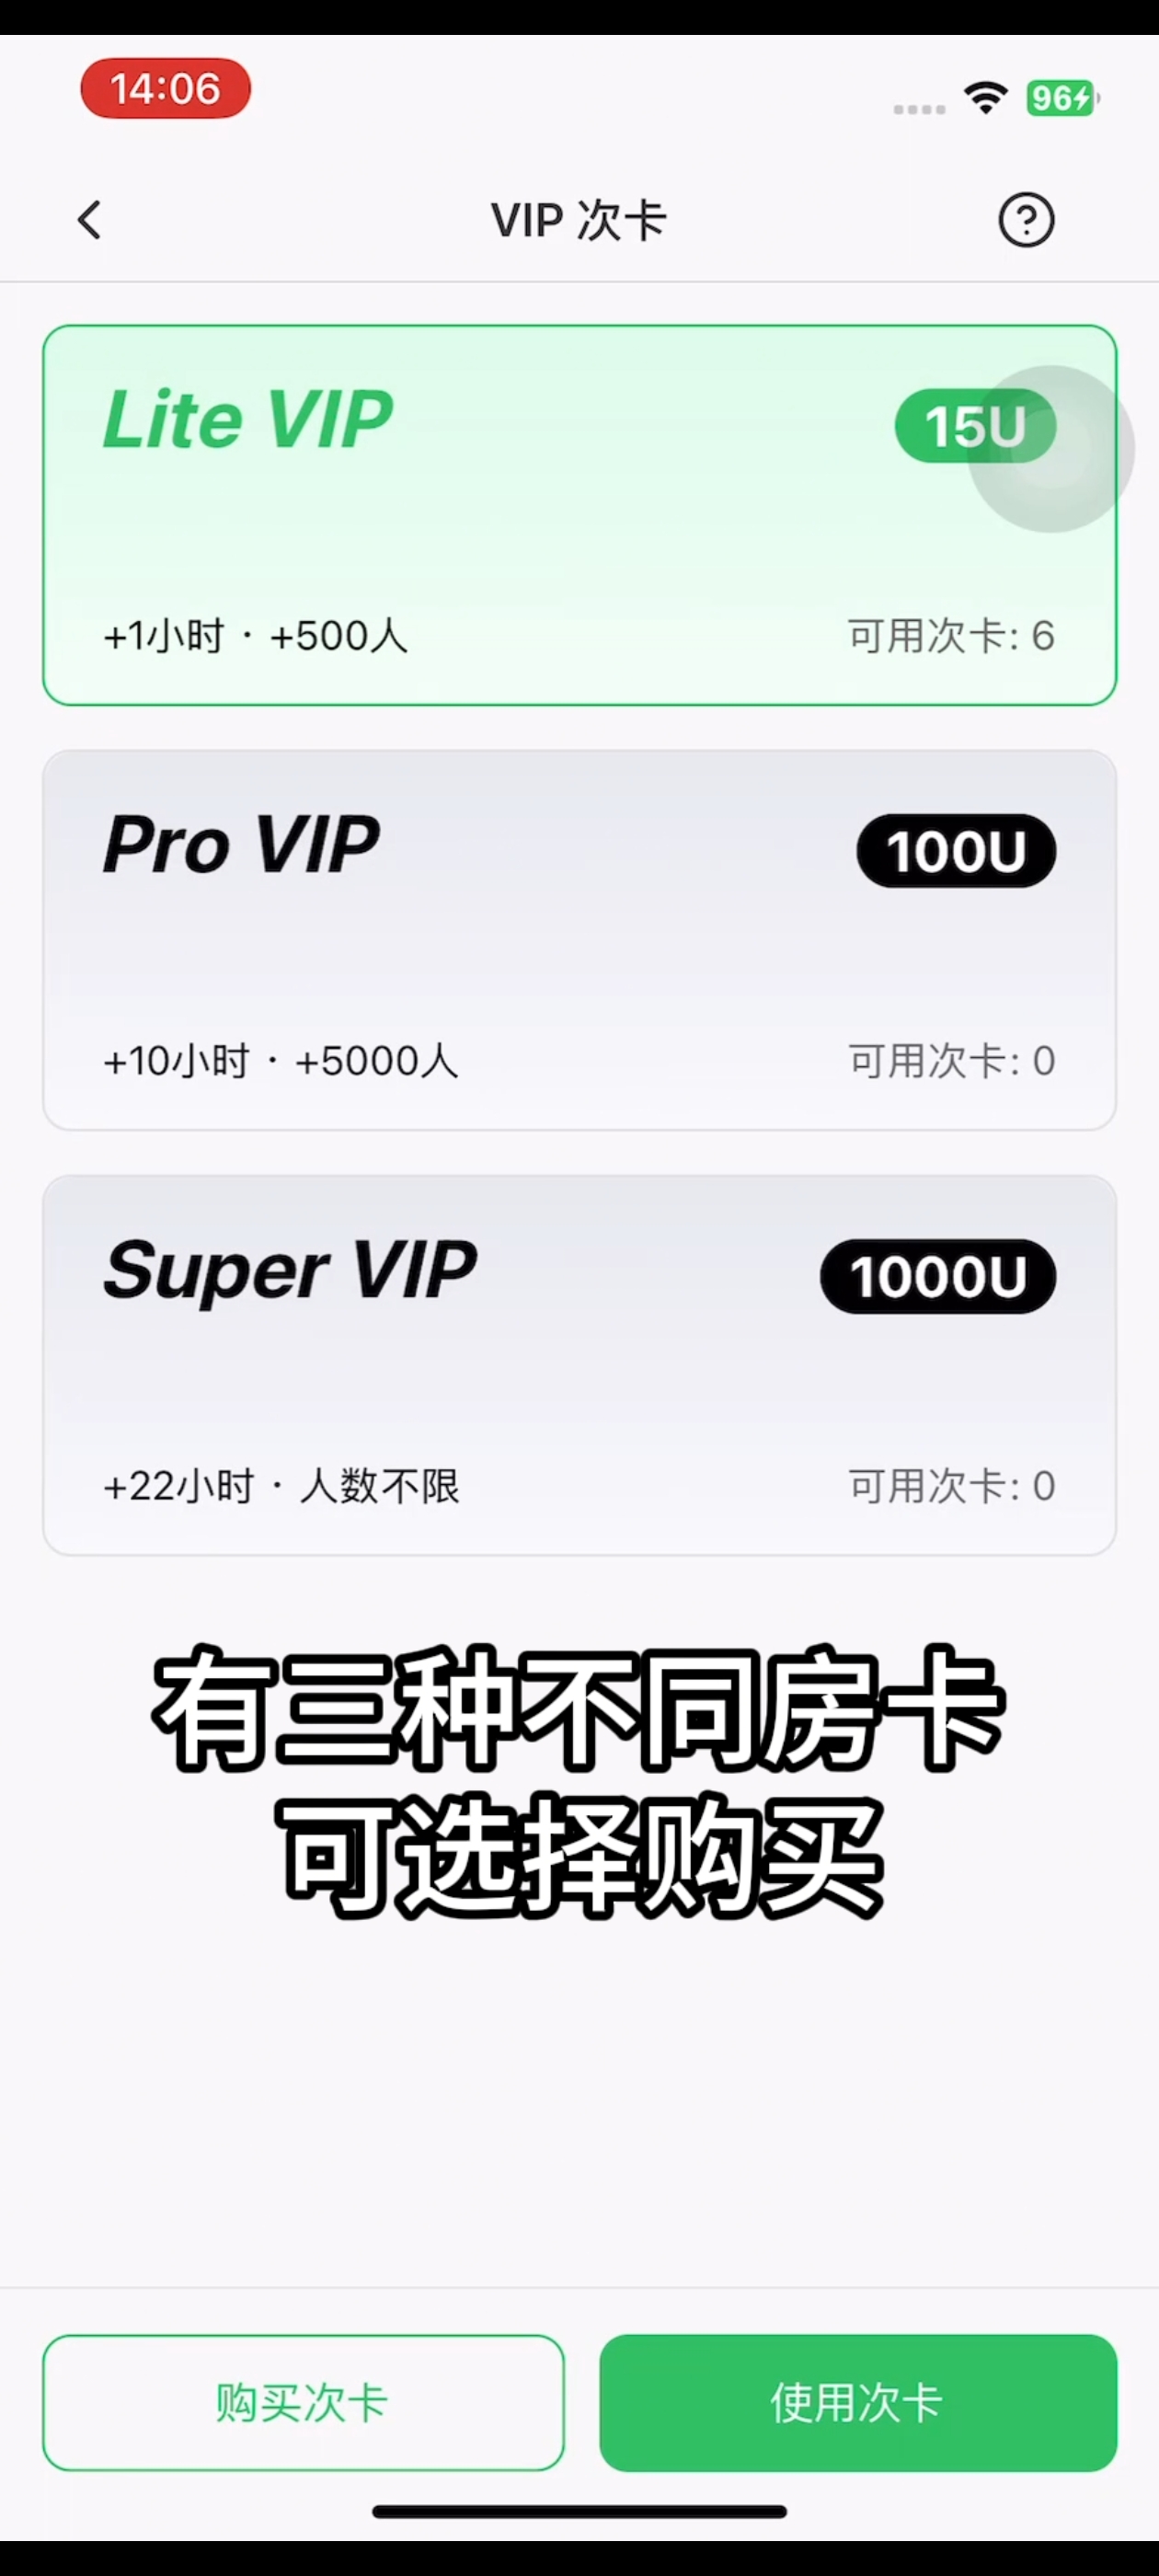
5. Step 5
Complete step 5 using the screenshot below.
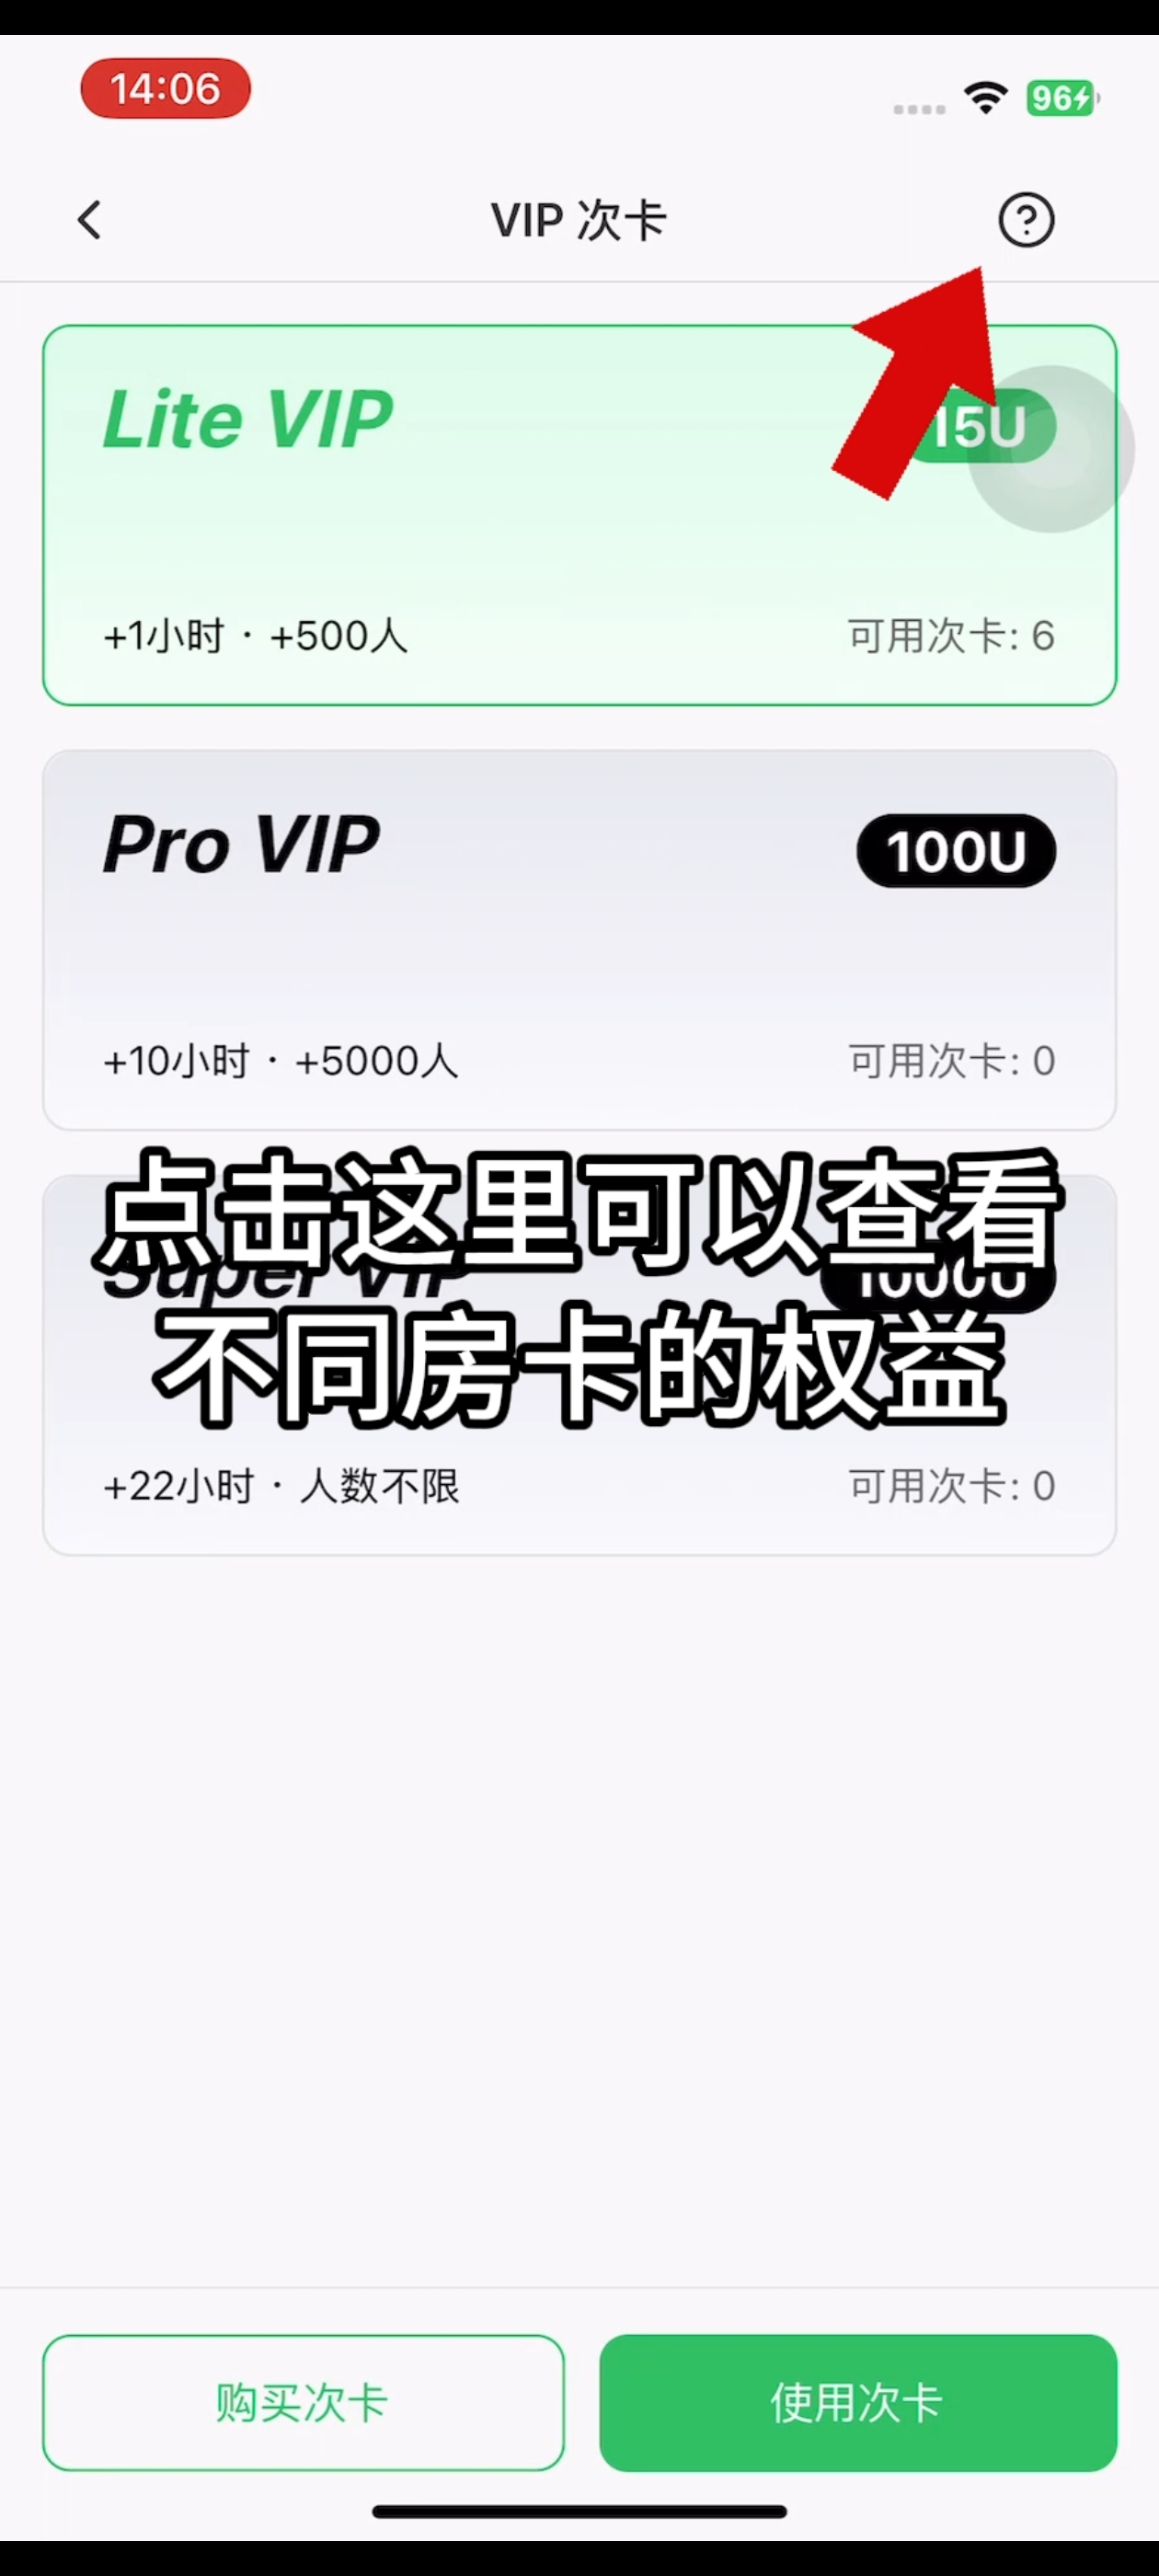
6. Step 6
Complete step 6 using the screenshot below.
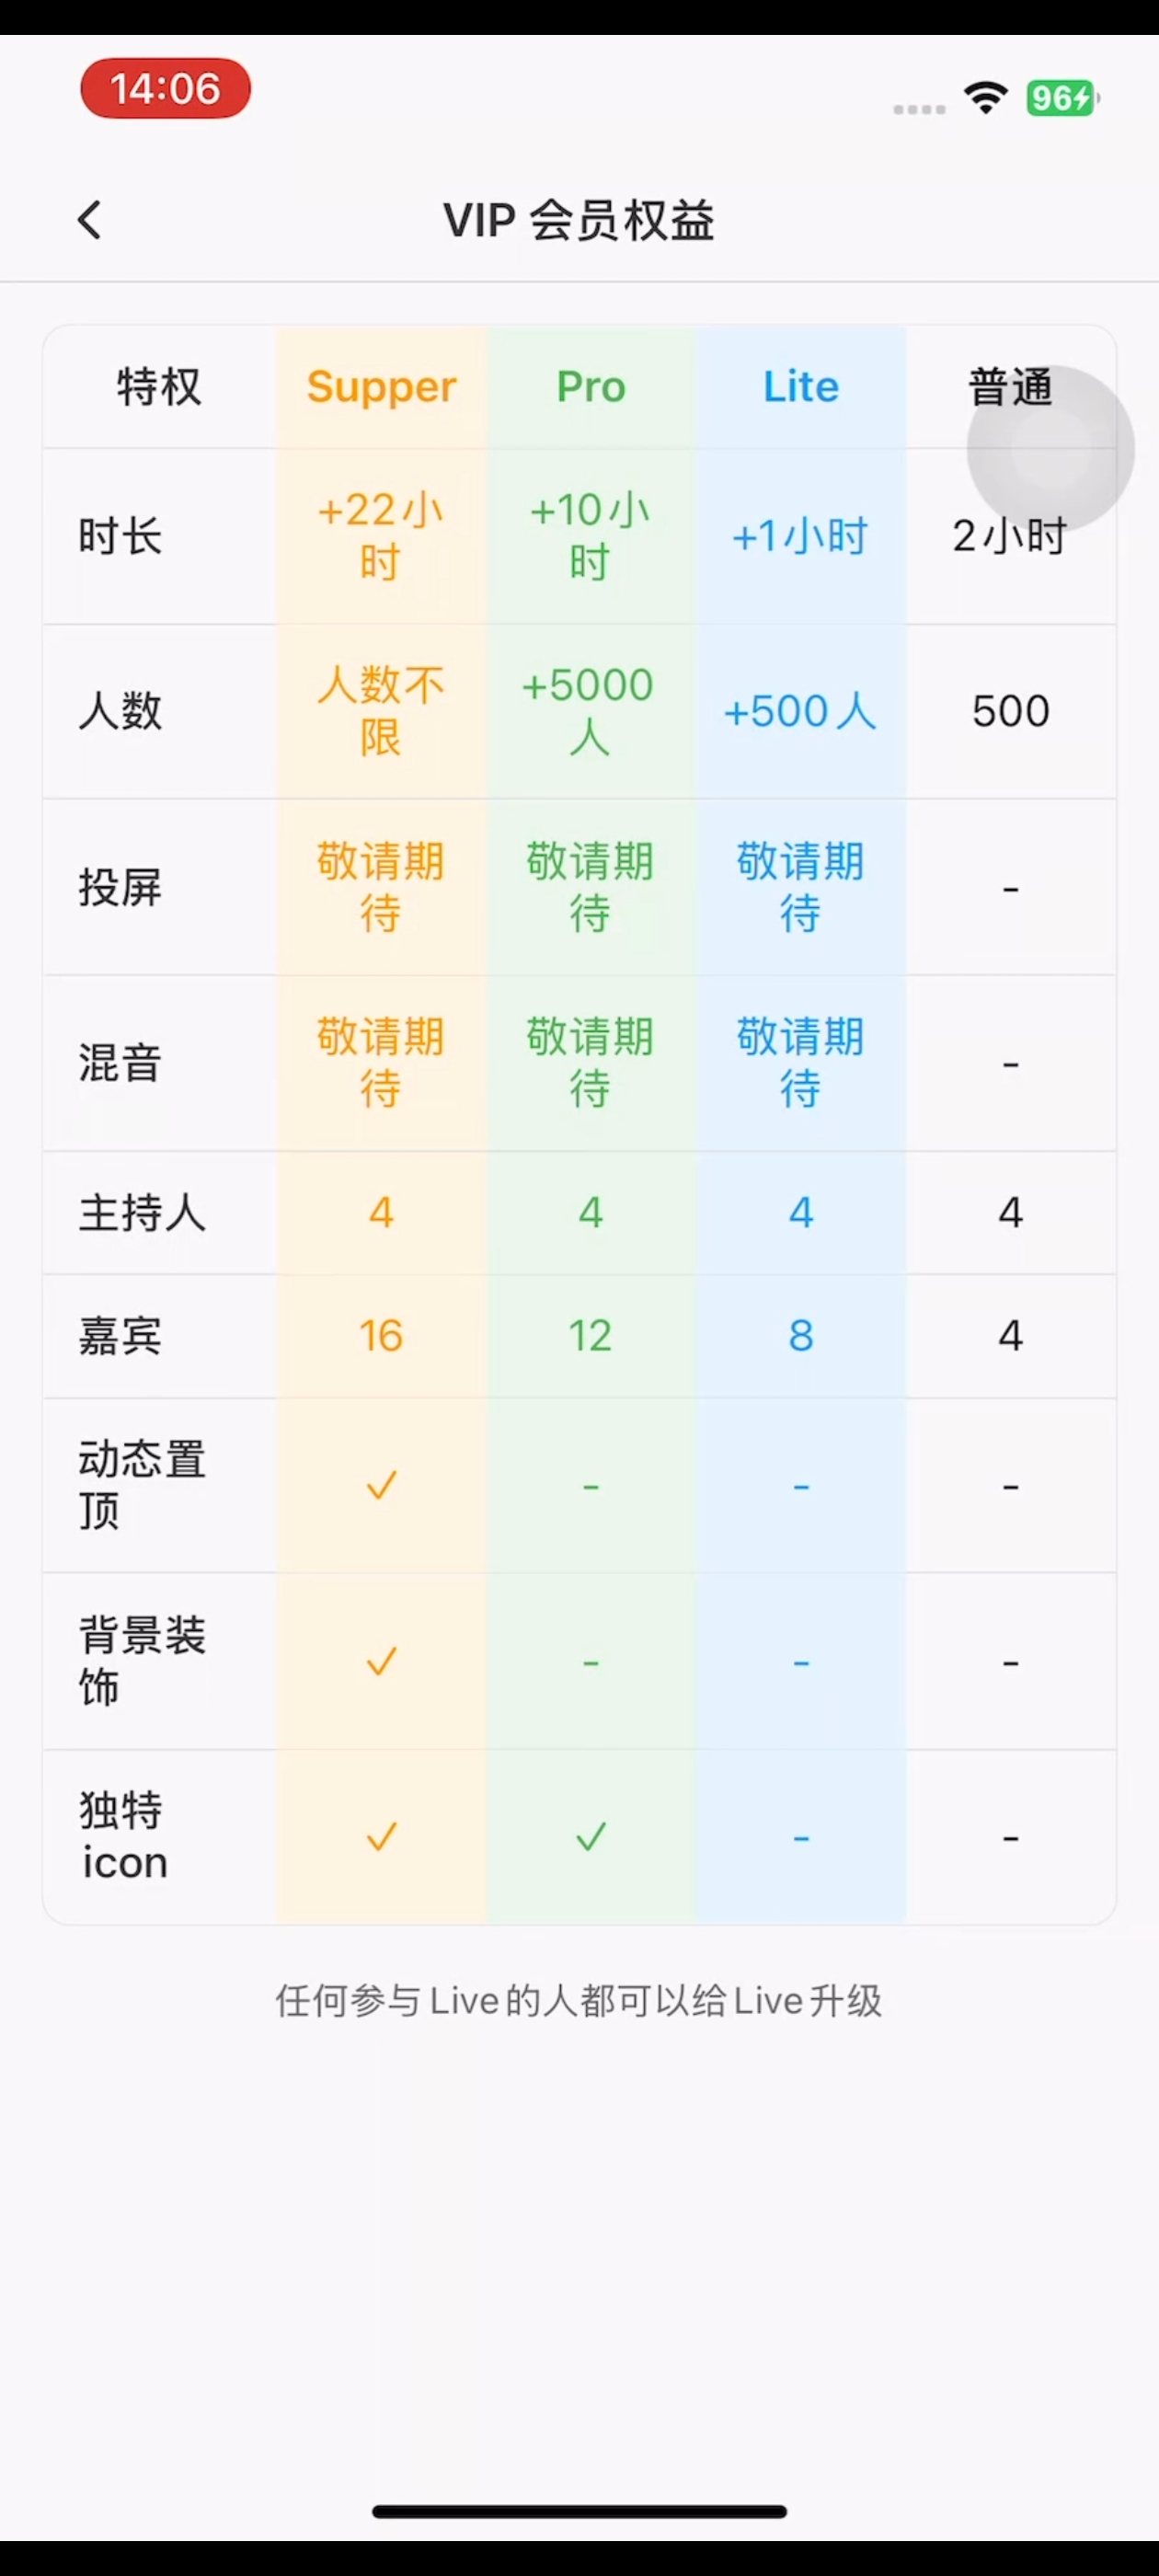
7. Step 7
Complete step 7 using the screenshot below.
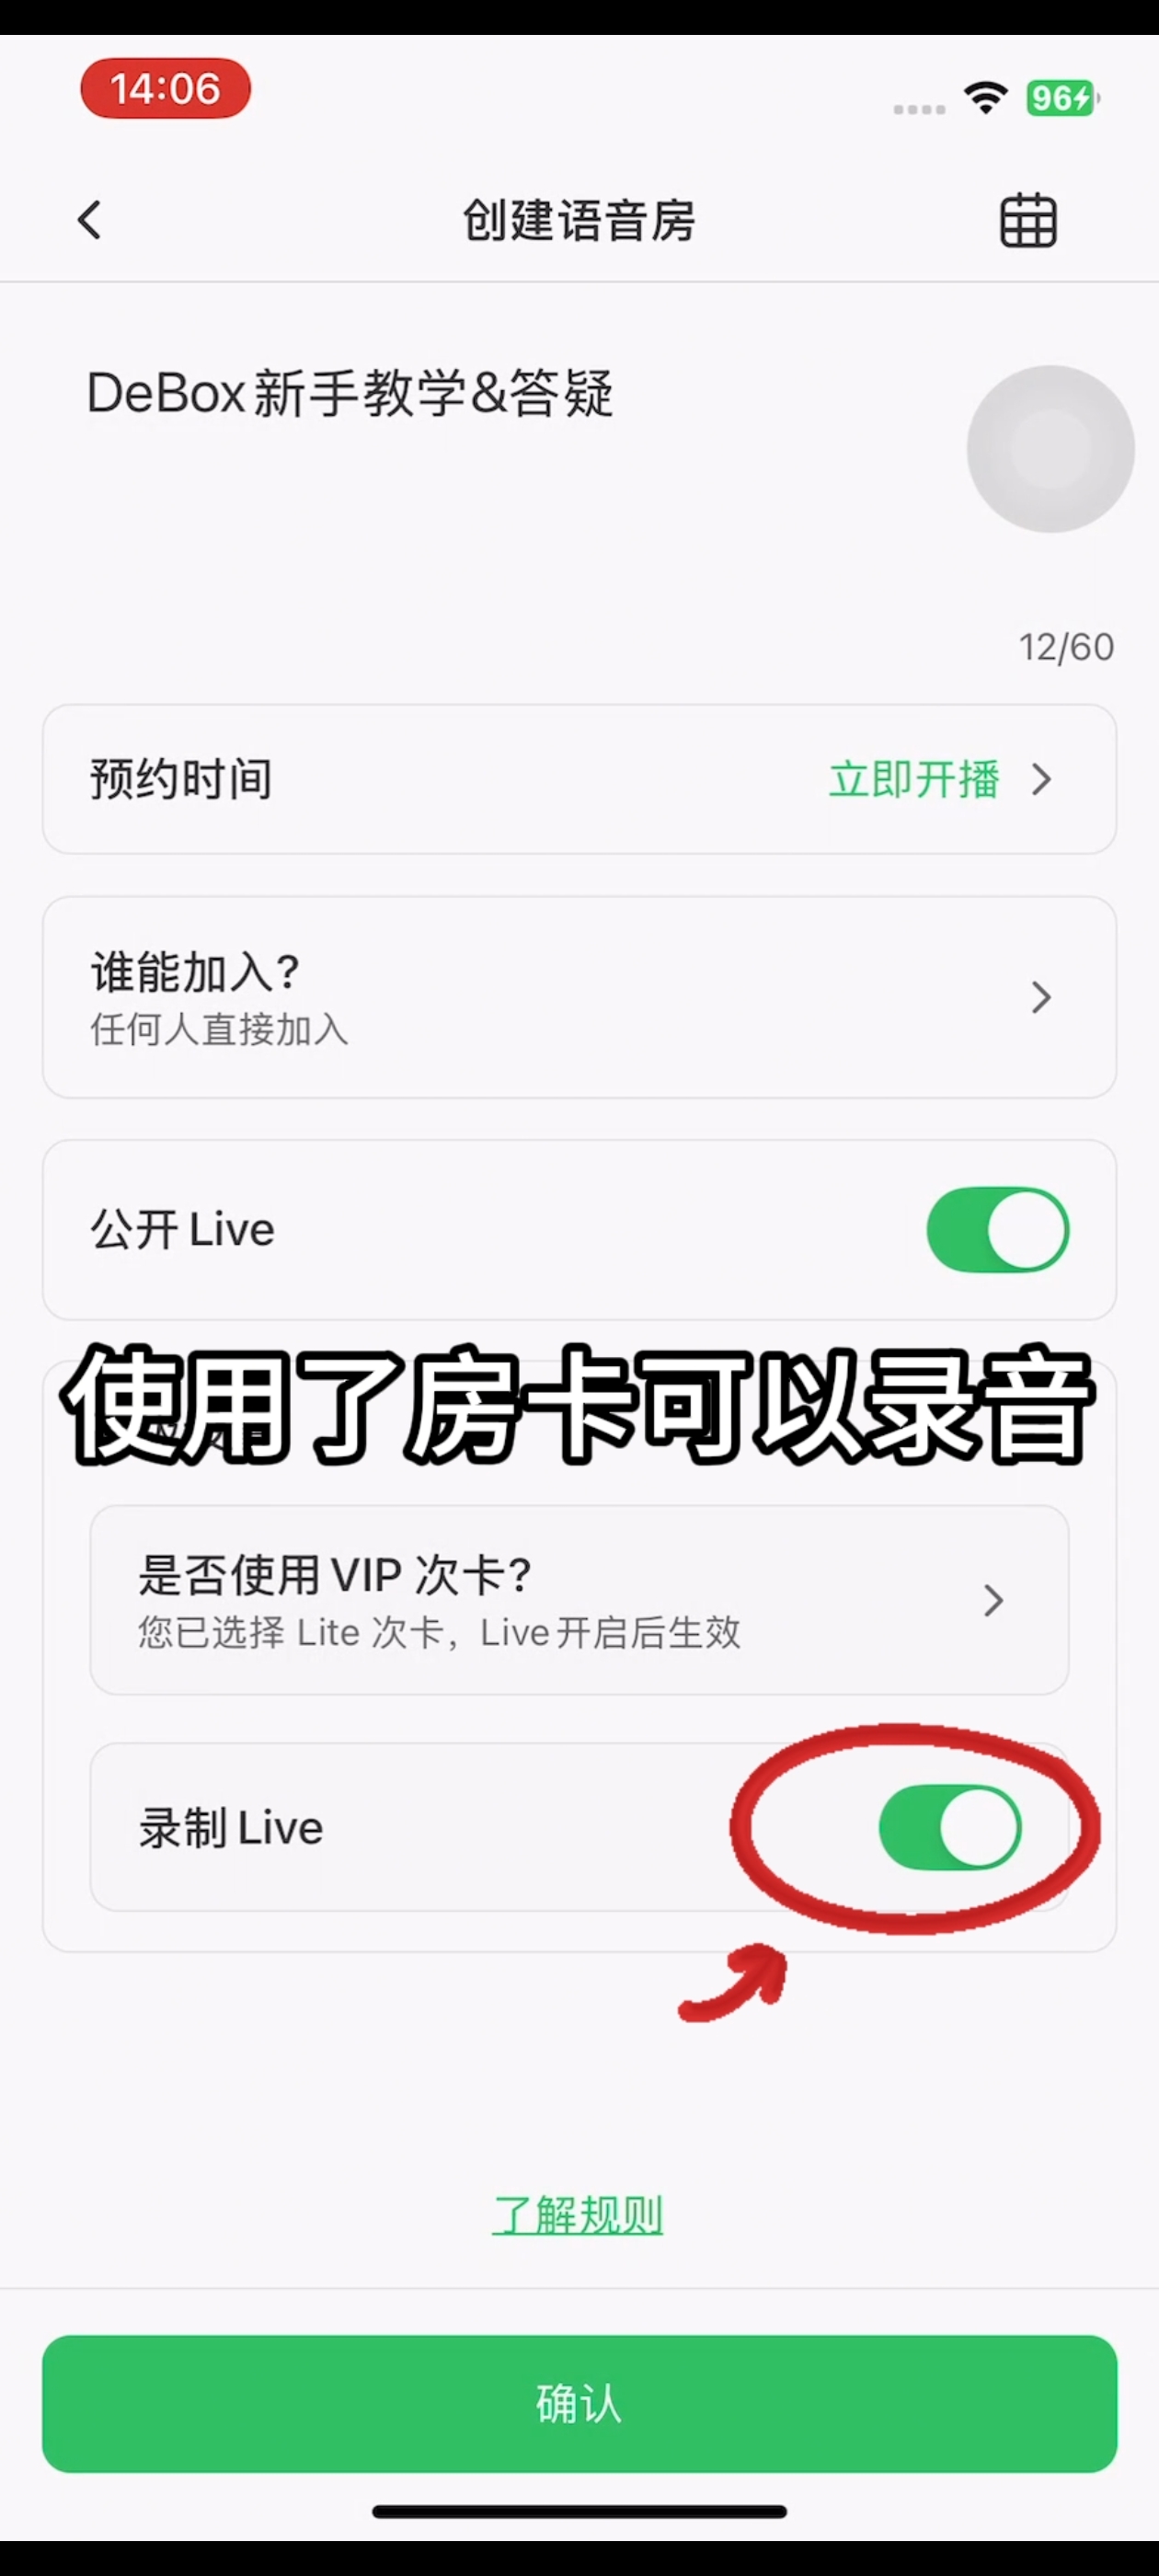
8. Step 8
Complete step 8 using the screenshot below.
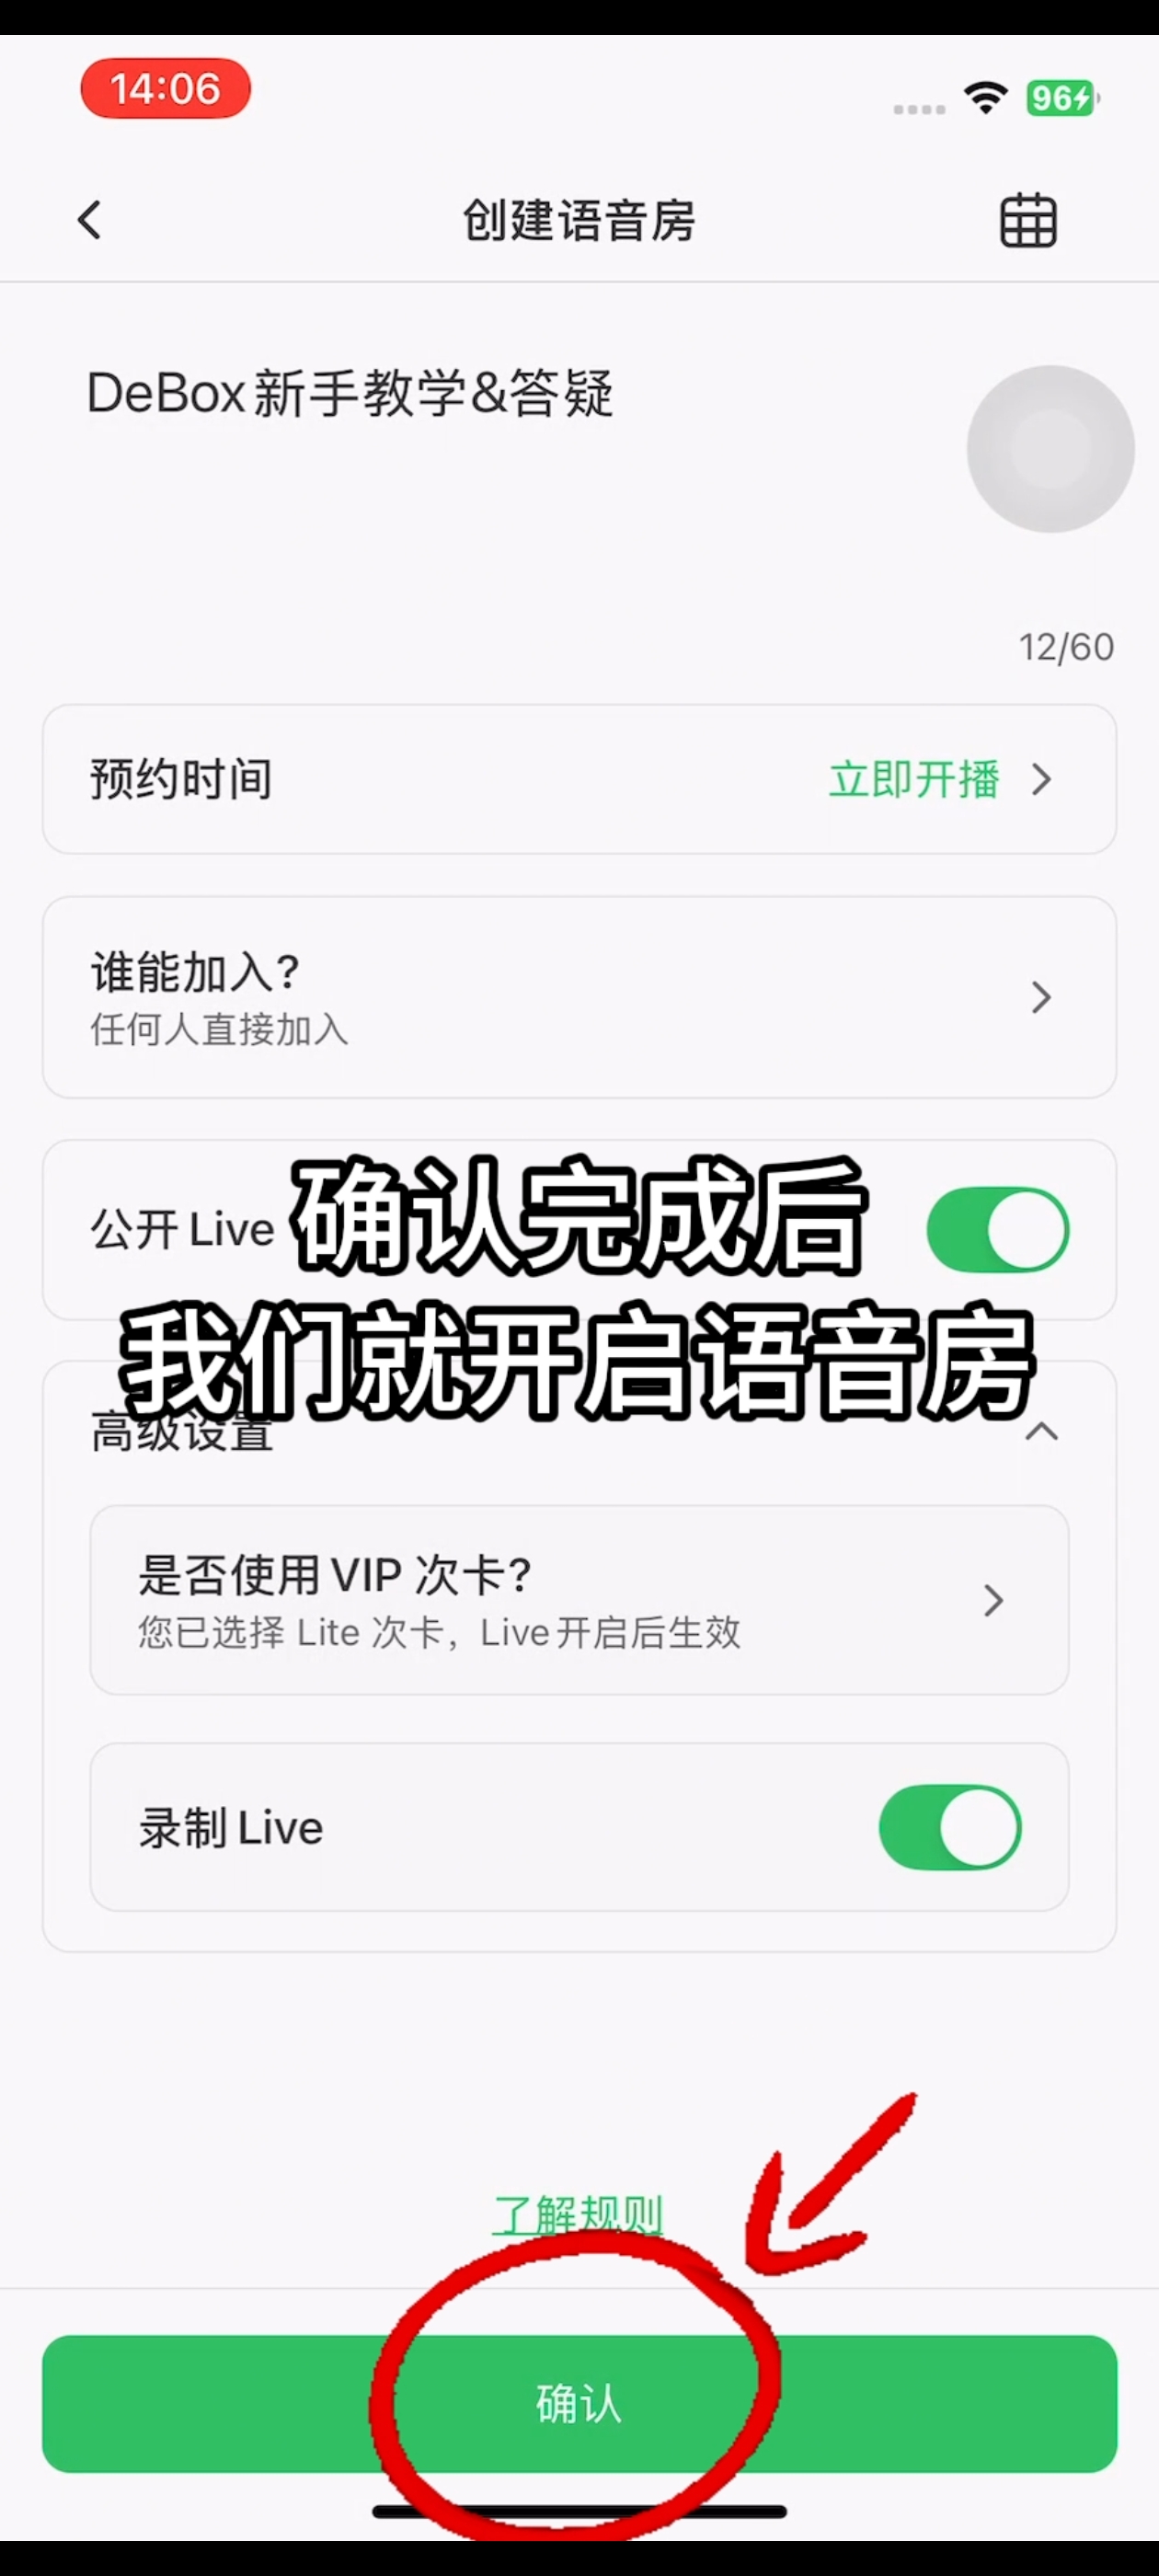
9. Step 9
Complete step 9 using the screenshot below.
Common questions
Can't find the entry?
Menu names may vary slightly by version. Use the current App as the source of truth, or watch the video walkthrough to locate the entry.
Don't have permission?
Group management actions usually require the group owner or an admin. For asset/payment actions, confirm you are signed in with the correct wallet account.